03 — Photos & Media
See the work
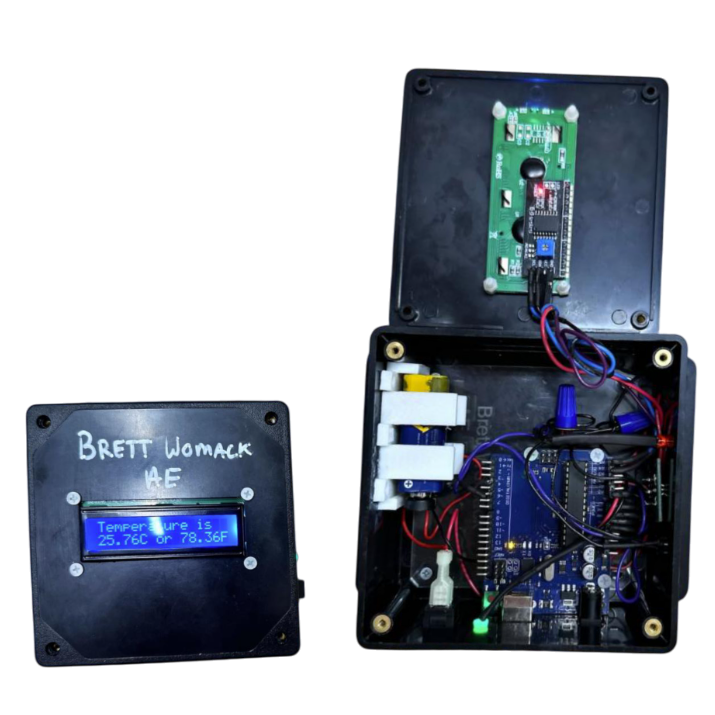

A self-contained device that monitors and displays ambient temperature in real time using an Arduino and DHT11 sensor.
Build a self-contained device that monitors and displays ambient temperature in real time as a first electromechanical engineering project.
Learn the fundamentals of sensor interfacing, microcontroller programming, and enclosure design through hands-on building.
Produce a polished, functional prototype that demonstrates understanding of the full design-to-build process.
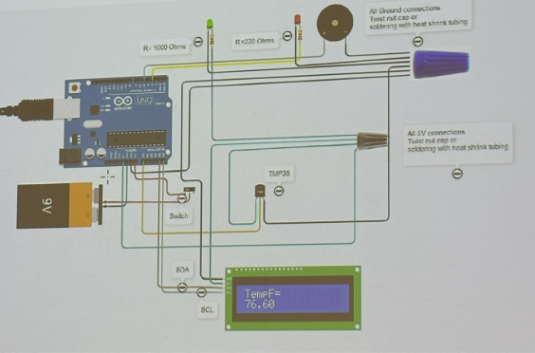
Wired the DHT11 sensor and 16×2 LCD on a breadboard first. Verified readings appeared correctly in the Arduino Serial Monitor before writing any display code.
Wrote a sensor polling loop with a 10-sample rolling average to smooth noisy DHT11 readings. Formatted the LCD output to show °F and °C simultaneously.
Measured all components (Arduino, LCD, battery) and modeled a fitted enclosure in TinkerCad with ventilation slots on the sides to prevent heat buildup near the sensor.
Printed the enclosure, transferred the circuit from breadboard to protoboard with soldered connections, then validated accuracy against a known thermometer over 30 minutes.
Temperature accuracy ±1°C versus reference thermometer — within acceptable range for the DHT11 sensor class.
LCD updated every 2 seconds with clean, readable formatting showing both °F and °C on a single display line.
Enclosure fit perfectly on first print with no modifications — dimensional modeling from TinkerCad translated accurately to the printed part.
Foundation for all future projects — skills in sensor interfacing, microcontrollers, and enclosure design applied directly to every subsequent course project.