TEMPERATURE SENSING BOX PROJECT
Goals
Optimize for reliability, cost efficiency, and ease of maintenance to support large-scale implementation
Role
Individual Project
Timeline
January 2025 - May 2025
Tools
- OnShape
- TinkerCad
- Arduino
- Soldering
- 3D Printing
Results
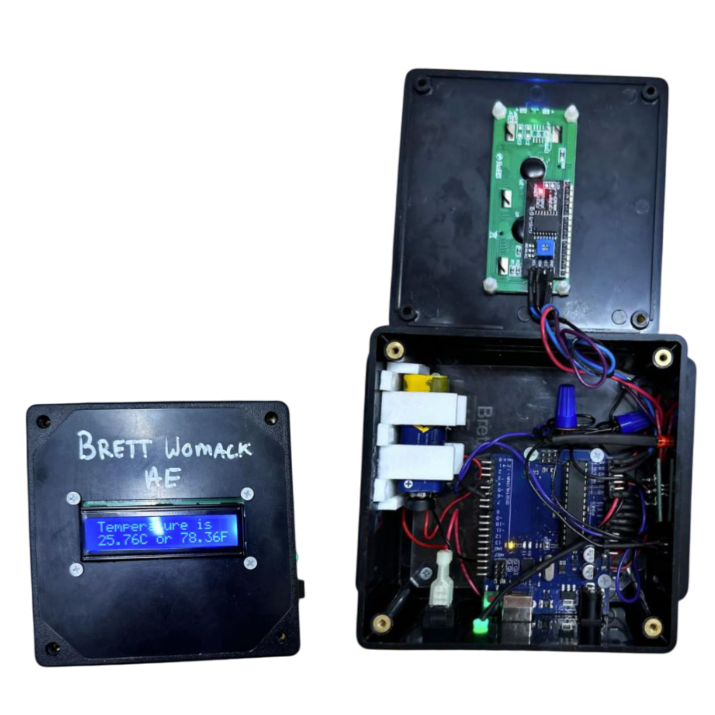
- Built a temperature-sensing alert box that functioned reliably, activating a green LED between 70–75°F and triggering audible and visual alarms outside that range.
- Confirmed stable performance with no malfunctions, though sensor accuracy showed minor fluctuations compared to a thermometer.
- Identified opportunities to reduce size and improve precision for future iterations while maintaining strong potential as a real-time environmental monitoring tool.
3D Modeling & Printing
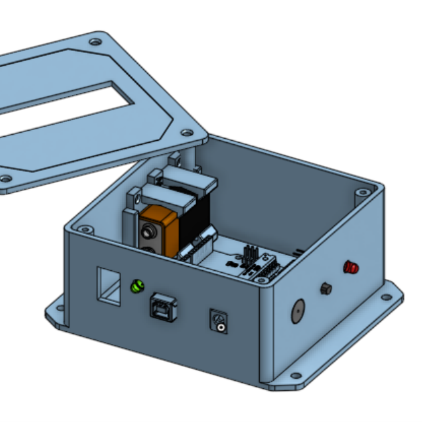
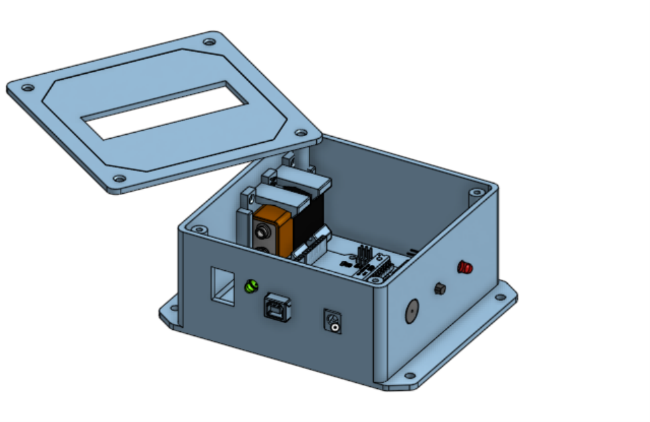
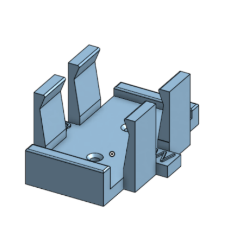
- Used OnShape to model box for design plan and model Battery Holder for 3d Printing.
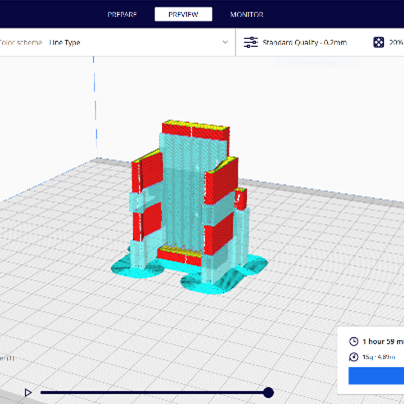
- Imported STL files into PrusaSlicer to setup for 3D printing and export gcode file.
- Modeled Box to plan where cuts in box would go for LEDs, temperature sensor, plug, and alarm.
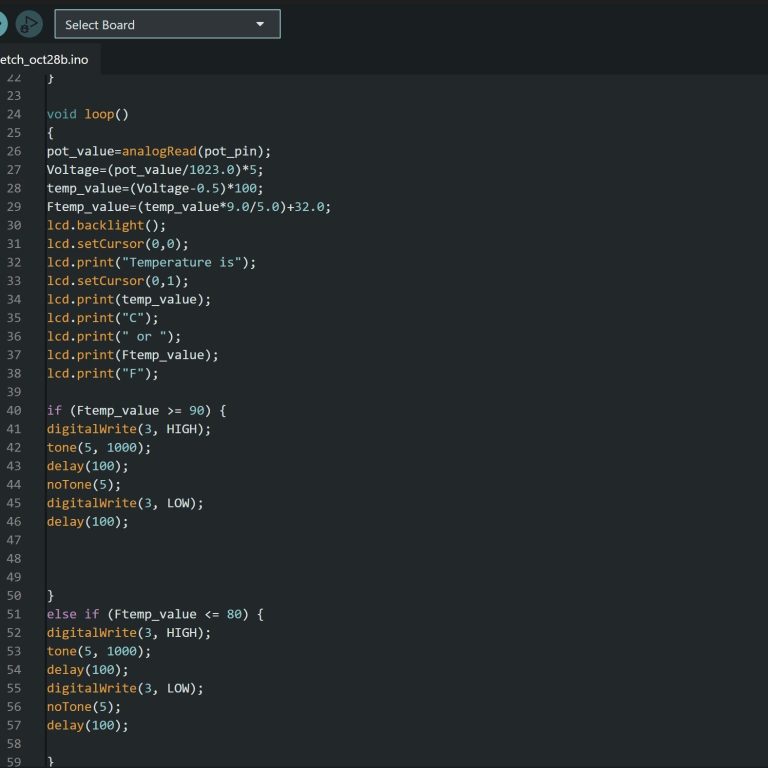
Wiring and Code
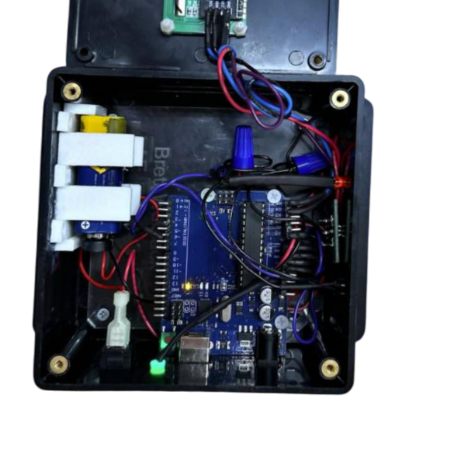
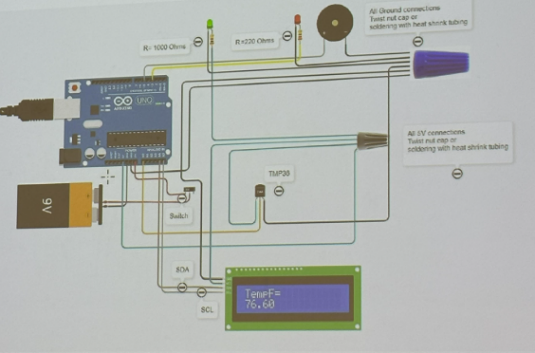
- Used TinkerCad to design wiring diagram to ensure correct connections before soldering anything together and get a neat wiring layout for final design.
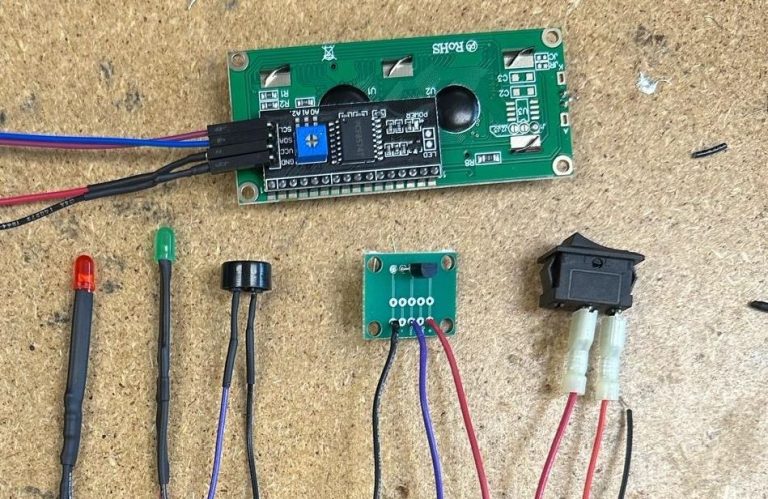
- Used Soldering Iron to make secure connections between components (LEDs, LCD Display, Temperature Sensor, and Alarm) and Arduino Uno board.
- Used Arduino interface and library to code and upload code for the Arduino Uno.
Temperature Sensing Box Demo
Showing how no alarm sounds at room temperature and green light is on, but when temperature is out of range alarm sounds and red light flashes.
Results
- Successfully built and tested a temperature-sensing box with no operational errors.
- Green LED activated between 70–75°F, with audible and visual alarms outside this range.
- Identified minor accuracy fluctuations, suggesting future improvements in sensor calibration and size reduction.